For install instructions for other items, try these links
Automobile Carpet Installation Instructions: How to remove, install and replace your automobile carpet
STOP!
Read Entire Instruction Sheet Before Starting!
Do not cut the carpet until you are
sure the auto carpet is correct for your Automobile!
For additional install instructions
you can print or read this document
(Adobe Acrobat is required)

Some late model Automobiles are equipped with a catalytic converter shield on the floor. Do not remove the shield; install the auto carpet over it. Your new Stock Interiors molded carpet has been produced slightly oversize requiring some trimming for that perfect fit into your car. You will need a good pair of scissors and a razor knife.
Note! Please take your TIME! Your auto carpet has been custom molded to fit your automobile. Plan to leave enough time for the disassembly of your interior, removal of the old auto carpet, proper installation of the carpet and reassembly of your interior. Approximate time 3 Hours.

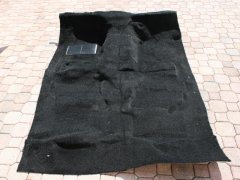
Remove your new automobile carpet from the box, unroll and lay the carpet in a warm area and allow it to settle for one to two hours before attempting to install. This will allow the automobile carpet to regain its molded shape. Using your hand, you can push the contoured sections of your new carpet back to their molded position. Keep in mind, the carpet may have wrinkles that do not relax completely before being installed, and the molded contours in the carpet may look flattened from shipping; this is normal. After being installed properly, the carpet will regain and hold its molded shape.

- Remove sill plates (metal or plastic strip holding Automobile carpet at threshold of the door). Be sure to keep the screws.
- Before you unplug any wiring or electrical components, disconnect the battery cables first
-
Remove the front seats and seat tracks by removing the floor bolts in the seat tracks. Be sure to check for and disconnect any electrical connections. Some seat bolts go through the bottom of the vehicle. In this case, remove rubber plug to access these bolts. A deep well socket may be needed.
-
If your car is a general motors from 1958 to 1964, you will find that the gas pedal can be taken off by lifting pedal off sideways. This will permit easier installation of the front carpet. When replacing the pedal, simply force it back on with your hands or foot.
-
Remove rear seat cushions and center console if applicable.
-
In some vehicles, seat belt mounting will not affect carpet installation. In other vehicles, seat belt floor brackets may have to be removed for total access for removing old carpets and installing new. Sometimes these are held with standard bolts or nuts, sometimes they are held wit a bolt that has a star shaped, recessed opening. These can sometimes be grasped and turned by vise-grip pliers. Otherwise, most auto supply stores have the star bits available for sale for use with standard sockets sets. They are called torx or star bits.
-
It may be required to remove or loosen the kick panels and other moldings to remove the old Automobile carpet.
-
Remove the old Automobile carpet but KEEP IT! Do not discard the old carpet yet.

It is very important that you verify your new auto carpet now, before you begin the installation. Once you begin to cut your new carpet, it may no longer be returnable, so now is the time to verify that the carpet you received is the correct item for your vehicle.
The easiest way to verify your new carpet is to lay it overtop of your old carpet and line up the molded contours of both carpets. Keep in mind, the new carpet has just been shipped in a box and it will have some wrinkles that have not relaxed and some of the molded contours will look flattened. This is normal and should not be mistaken as a manufacturing problem. After being installed properly, the carpet will regain and hold its molded shape. If your old auto carpet is not available, you can also "dry-fit" the carpet to your vehicle's floor pan.
At this point, if the contours in your new carpet in a different location than the contours in your old carpet, do not continue with your installation.

- Remove the old carpet padding, leave the body insulation on the floor (do not remove the catalytic converter shield if the vehicle has one on the floor)
- Vacuum or sweep the floor, remove all loose matter
- Use a stiff wire brush on rust spots and a mild solvent to clean the floorpan if necessary
- Place the old automobile carpet over your new molded carpet.
- Mark any holes or additional cutout on the carpet with chalk
- Do Not Cut the carpet Yet!


Carpets with holes cut in the wrong place will not be acceptable for return. This procedure should be done carefully to avoid cutting holes in the wrong place. When cutting or trimming, always make minimal cuts. You can always make a second cut, but you can not undo a cut once it has been made. It is best to wait until the very end to trim around the edges of your new carpet.
- Lay carpet flat outside the vehicle. Fold in half by pulling front edge back over to meet rear edge
- Center folded carpet over the transmission hump just in front of the front seat
- Slowly unfold the carpet toward the front firewall and underneath the pedals
- Do not make any cuts until you fully understand the carpet layout, and you are sure it is in the correct place
- Match the contours of the auto carpet with the floor; be sure the heel pad is under the area for the brake pedal.
- When you reach a shift lever cut a small "x" shaped slit just large enough for the shift lever rod to fit through. Note: Some factory floor shift levers can be removed for easier installation.
- It is best to wait until the very end to trim around the edges of your new carpet.
- Lift the carpet up and slide it down over the lever through the "x" slit
- Repeat steps 3, 4 and 5 if a second shift lever exist
- After the full installation of your carpet is complete, return to the shift levers and cut the holes larger. Be careful not to cut the hole larger than the boot or console that will cover the area
- Use the same "x" slit system if your vehicle requires a cutout for the floor dimmer switch
- Cut holes for seat bolts
- Center the carpet over the transmission hump and starting from the center of the hump, work out towards each side smoothing out wrinkles and pulling the carpet tight
- Note: Some people also prefer to use brush or spray adhesive on the floor to give a better, smoother fit which is less likely to move over time. After correct fit is determined, fold back sections of the carpet. Apply adhesive then smooth down and press into position
- On some carpets you will find slight excess of material on both sides at the sill plates and around the edges. This is purposely included to provide for possible variations of individual installations. If excess exists on your car, merely trim it off with scissors, being careful not to trim too much
- Slip end of carpet under sill plate at either side
- Replace Back Seat Bottom Cushion, Kick Plates, Console, Seat belt bolts, Front seats, Front seat bolts and any other trim that you removed prior to installation.
- Replace accelerator pedal, and smooth out carpet so that it lies flat. Replace sill plate and screws
- Slit to edge of carpet under valance, if your vehicle has one
- Note: some models will require hole openings for steer post pedals, mounting brackets, etc. These holes should be cut carefully after verifying that carpet fits properly
CONGRATULATIONS ! You have successfully installed another Quality Product from Stock Interiors. Now complete your interior with a quality set of custom fit floor mats made just for your automobile. Need carpeted door bottoms or kick panels? We sell your original style replacements. Call, e-mail, or visit us online for a complete catalog of other items made by Stock Interiors.